| View previous topic :: View next topic |
| Author |
Message |
Rob_McGrory
I've settled in...
Joined: 25 Mar 2007
Posts: 37
|
 Posted: Mon May 07, 2007 6:45 pm Post subject: Salvator Monitor Viv (Step by Step - picture heavy) Posted: Mon May 07, 2007 6:45 pm Post subject: Salvator Monitor Viv (Step by Step - picture heavy) |
 |
|
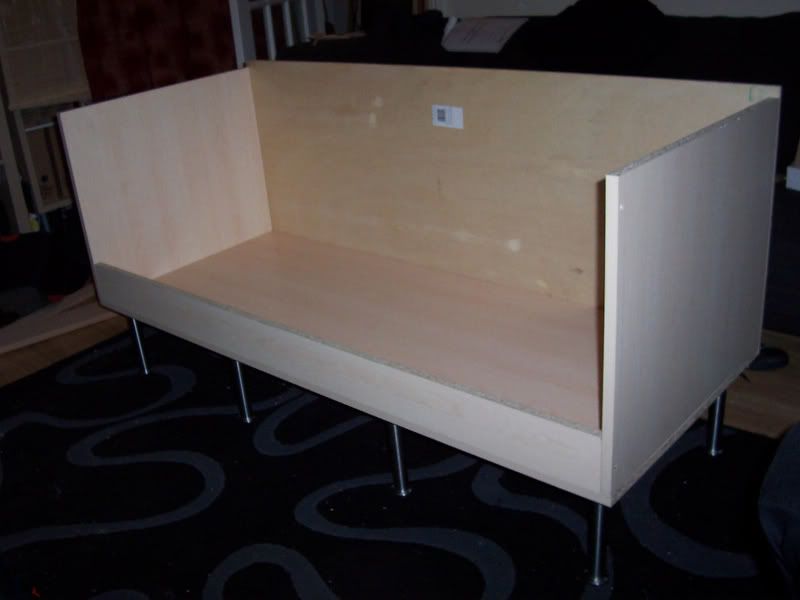
Me and my girlfriend have just finished building a new vivarium for my salvator monitor.
This will be his midsized viv 5ft x 2ft x 2ft and contains a plumbed in sink for ease of cleaning.
My girlfriend took step by step photos along the build so here they are
Buy wood from B+Q
Make up vivarium base, back, sides and bottom lip (leave top off for easier access)
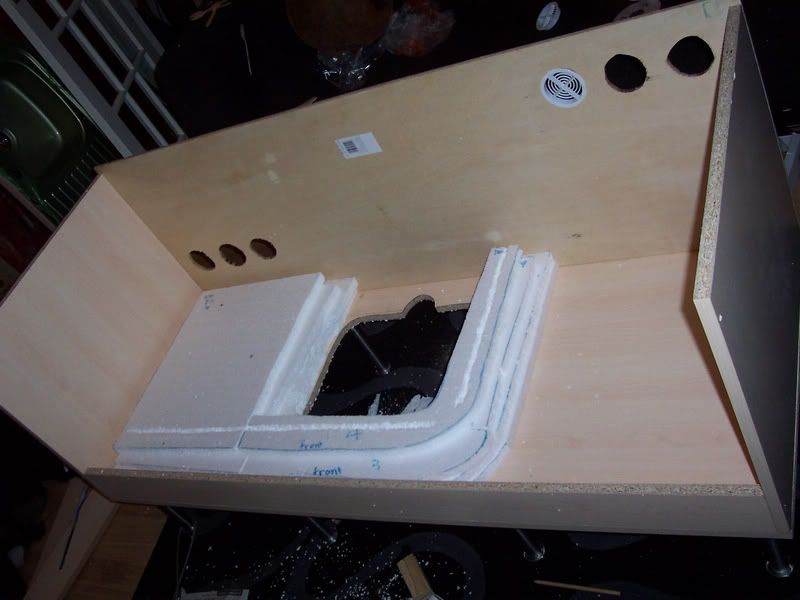
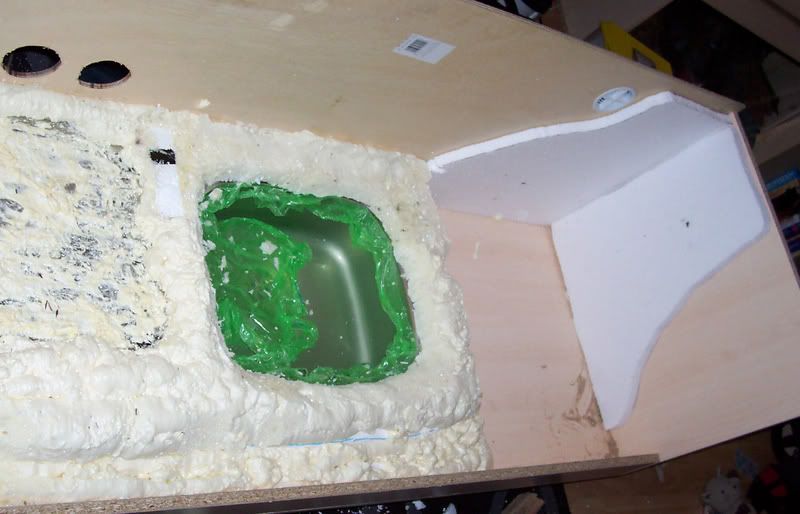
Measure and mark out for sink, plumb in waste water outlet.

Cut hole to set sink into base and cut holes for air vents
Cut 4 layers of 25mm polystyrene sheets to support sink
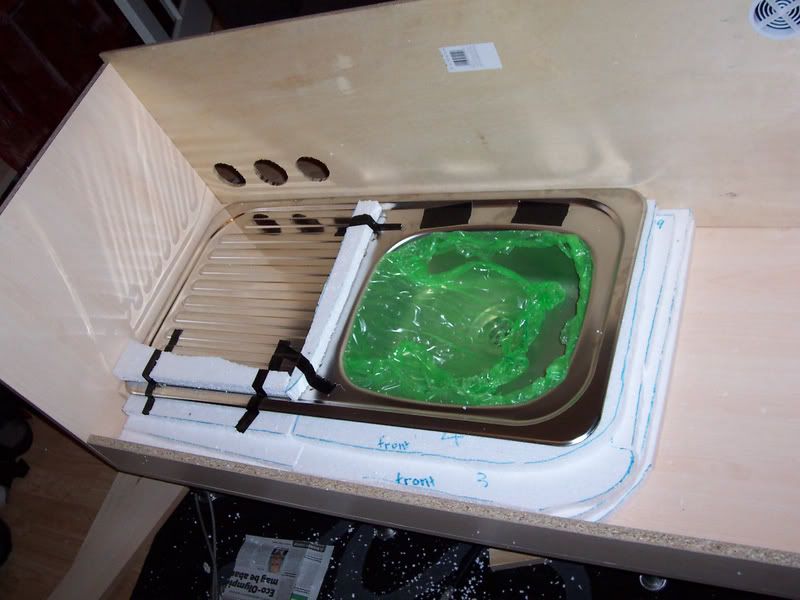
Fit sink
And then add two strips of polystyrene to build up a lip on draining board
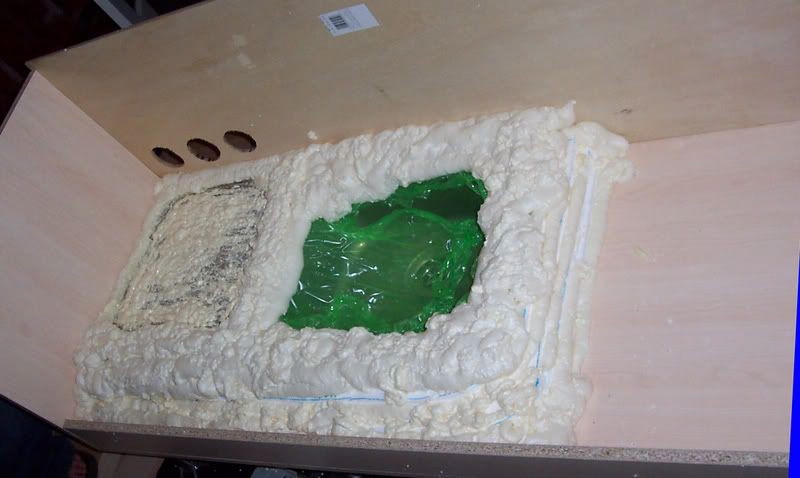
Cover in expanding foam
_________________
1.1.0 Bearded Dragons - Girr and Lenore
0.1.0 Royal Python - Wednesday
0.0.1 Salvator Monitor - Banski
0.0.2 African Pygmy Dormice |
|
| Back to top |
|
 |
Rob_McGrory
I've settled in...
Joined: 25 Mar 2007
Posts: 37
|
| Posted: Mon May 07, 2007 6:46 pm Post subject: |
|
|
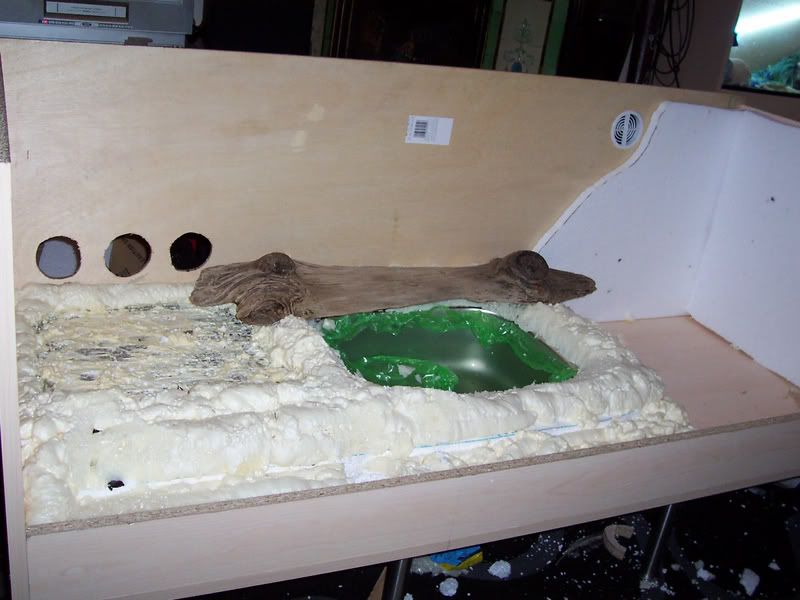
Smooth expanding foam on draining board so it doesnt expand too much
Trim excess expanding foam sloping into sink
Cut polystyrene sheets to form a tree root shape in right hand corner of viv
Trim out areas of expanding foam to fit chosen wood pieces
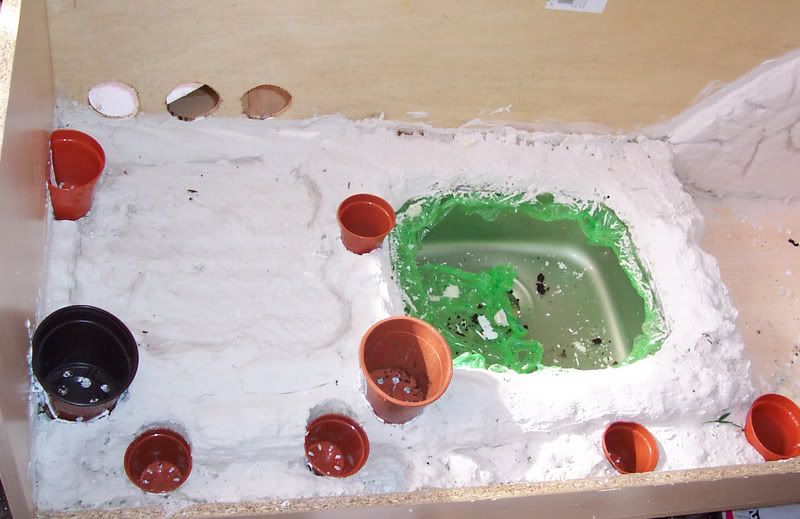
Cover all polystyrene and expanding foam with tile adhesive/grout (approx 3 layers)
 
Decide on location for plant pots and cut out spaces for these in expanding foam/polystyrene
_________________
1.1.0 Bearded Dragons - Girr and Lenore
0.1.0 Royal Python - Wednesday
0.0.1 Salvator Monitor - Banski
0.0.2 African Pygmy Dormice |
|
| Back to top |
|
|
Rob_McGrory
I've settled in...
Joined: 25 Mar 2007
Posts: 37
|
| Posted: Mon May 07, 2007 6:46 pm Post subject: |
|
|
Cover plant pots in tile adhesive/grout there will now be 4 layers of tile adhesive in total

Apply two layers of outdoor varnish to back plywood wall.
Cover all fake rocks with outdoor (waterproof) varnish and sieve on dry sand repeat twice, finish with a layer of outdoor (waterproof) varnish.
1 layer

2 layers
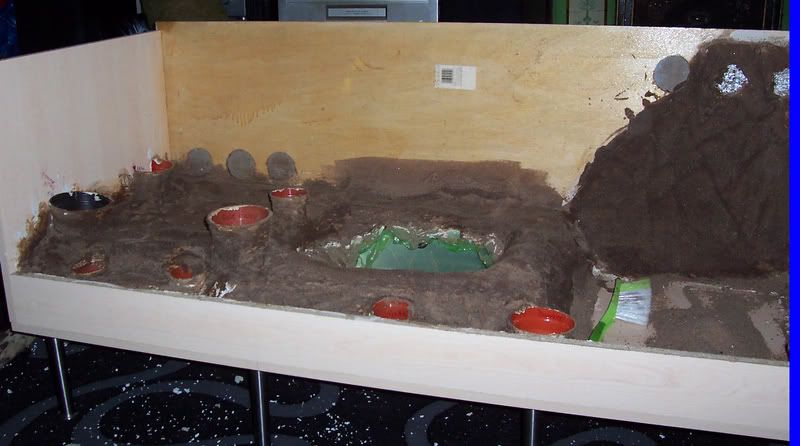
Cut plants pots at an angle, leave excess plastic on back to make it easier to stick to wall.

Mark position for UV tube
Mount plant pots to wall using screw and no more nails

_________________
1.1.0 Bearded Dragons - Girr and Lenore
0.1.0 Royal Python - Wednesday
0.0.1 Salvator Monitor - Banski
0.0.2 African Pygmy Dormice |
|
| Back to top |
|
|
Rob_McGrory
I've settled in...
Joined: 25 Mar 2007
Posts: 37
|
| Posted: Mon May 07, 2007 6:47 pm Post subject: |
|
|
Cover back and side walls with coco matting cover plant pots and cut slits in top to be able to put plants into pots
Attach coco mats with staple gun and screws with washers. leave loose at edges so that you can seal it once the top is on
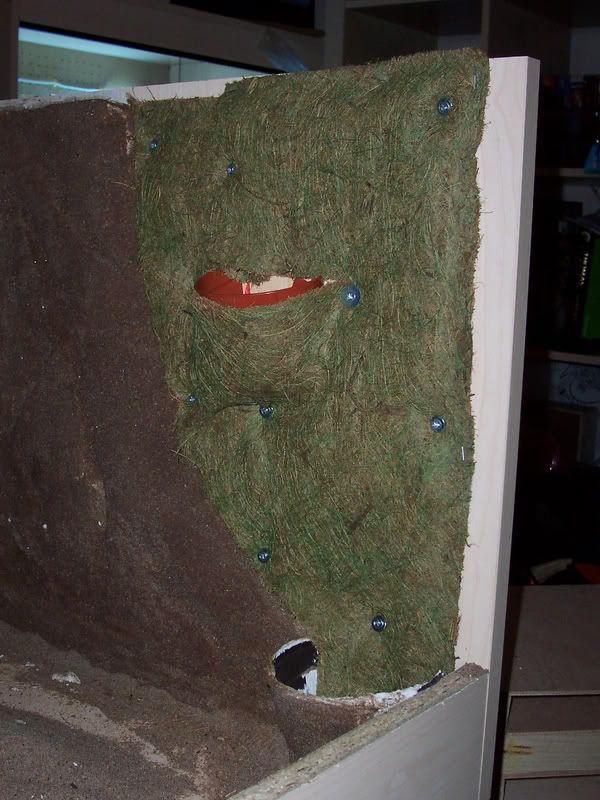 
Secure wood pieces into the vivarium, screw in place so they cannot fall and hurt lizard.
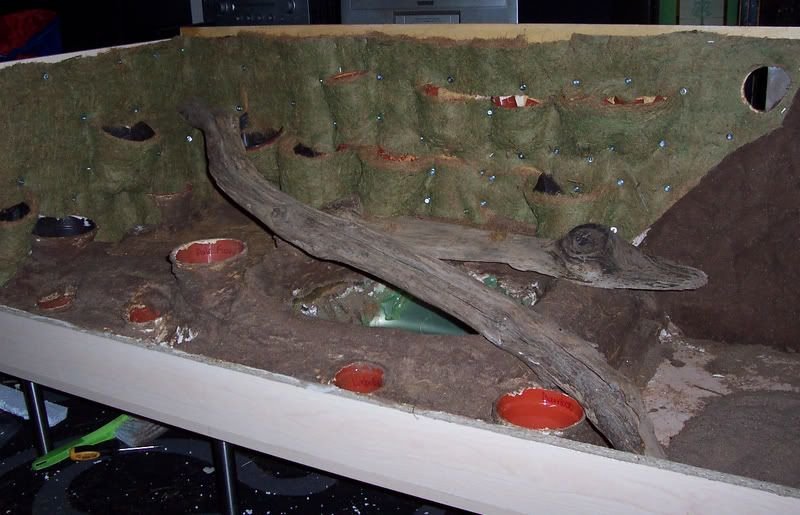

Seal bottom of all plant pots that sit into polystyrene/expanded foam/tile grout

_________________
1.1.0 Bearded Dragons - Girr and Lenore
0.1.0 Royal Python - Wednesday
0.0.1 Salvator Monitor - Banski
0.0.2 African Pygmy Dormice |
|
| Back to top |
|
|
Rob_McGrory
I've settled in...
Joined: 25 Mar 2007
Posts: 37
|
| Posted: Mon May 07, 2007 6:47 pm Post subject: |
|
|
Attach top of vivarium.

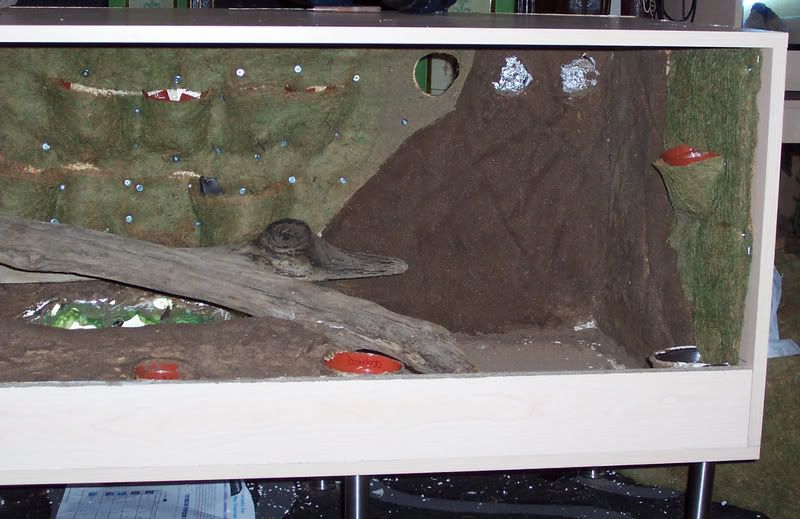
Seal all joints in vivarium with kitchen/bathroom sealant.
Screw cocomat right up to sealed joints
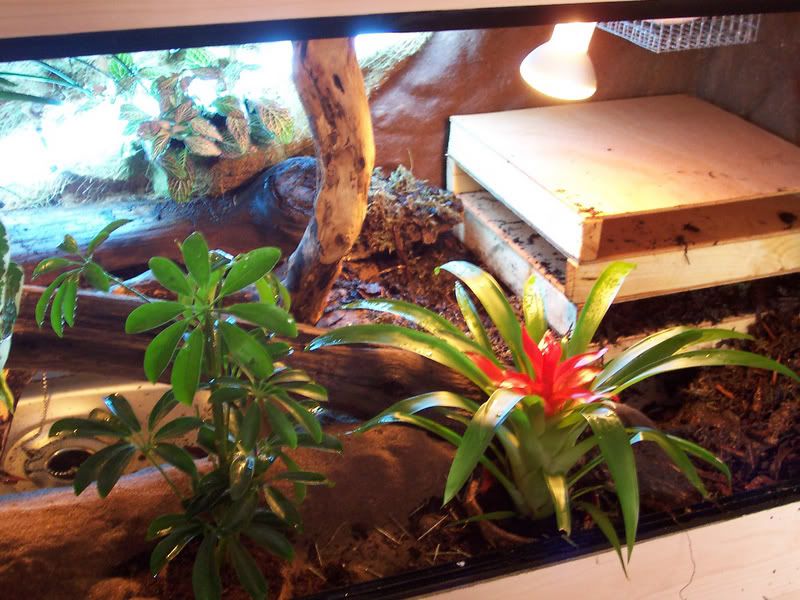
Pot plants into floor and wall.
Add air vents seal with no more nails/sealant
Cut glass runners to size stick with no more nails
Wire in heating and lighting

* in retrospect would probably suggest doing wiring for heating and lighting before planting plants*
_________________
1.1.0 Bearded Dragons - Girr and Lenore
0.1.0 Royal Python - Wednesday
0.0.1 Salvator Monitor - Banski
0.0.2 African Pygmy Dormice |
|
| Back to top |
|
|
Rob_McGrory
I've settled in...
Joined: 25 Mar 2007
Posts: 37
|
| Posted: Mon May 07, 2007 6:48 pm Post subject: |
|
|
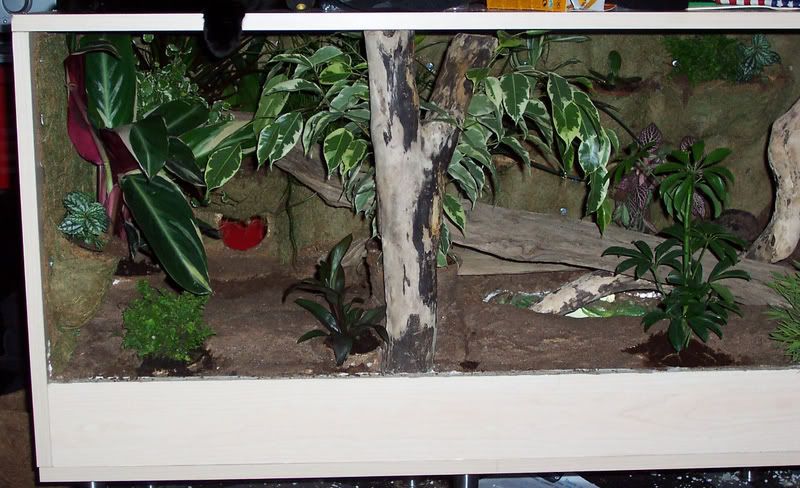
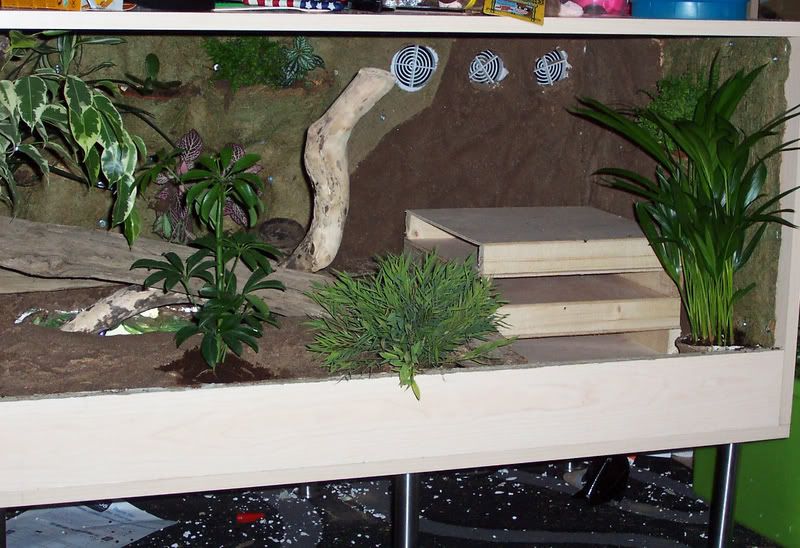
Add retes stack
Put substrate deep in right hand side and shallow on draining board.
Measure glass and get cut
_________________
1.1.0 Bearded Dragons - Girr and Lenore
0.1.0 Royal Python - Wednesday
0.0.1 Salvator Monitor - Banski
0.0.2 African Pygmy Dormice |
|
| Back to top |
|
|
lol93
Site Moderator

Joined: 29 Aug 2006
Posts: 3172
Location: Glasgow
|
| Posted: Mon May 07, 2007 7:06 pm Post subject: |
|
|
You've done an amazing job! What a lot of hard work! Your monitor will love it for sure. Well done! 
_________________
 |
|
| Back to top |
|
|
kroakykaren
Site Moderator

Joined: 11 Sep 2005
Posts: 5270
Location: North East
|
| Posted: Mon May 07, 2007 7:15 pm Post subject: |
|
|
Wow superb,what a mammoth job, it looks splendid, and the step by step pics were great thanks for sharing
_________________
  |
|
| Back to top |
|
|
Mich
Contributing Member
Joined: 05 May 2007
Posts: 59
Location: Barking, London
|
| Posted: Mon May 07, 2007 7:58 pm Post subject: |
|
|
Thanks everyone 
took us about 3 weeks in total (just evenings and weekends tho)
Just need to get the glass cut to size and the little guy will hopefully be in there by next weekend
Mich (Rob's girlfriend)
_________________
0.1.0 Royal Python - Wednesday - CB04
1.1.0 Bearded Dragons - Girr and Lenore - CB06
1.0.0 Cat - Ozzy |
|
| Back to top |
|
|
minno
Key Member

Joined: 08 Apr 2007
Posts: 376
Location: nottingham
|
| Posted: Mon May 07, 2007 8:07 pm Post subject: |
|
|
| yea defo looks amazing, im planning something good 4 my geckos just getting round 2 it really |
|
| Back to top |
|
|
|

